To create and configure a matching process you need to define the format for your Data inputs. Duco can automatically determine the input format from any sample files you upload. You can alternatively define input formats manually, field-by-field, or use set templates such as FIXML or SWIFT MT940.
When setting up a new process, the data inputs are defined using a combination of these two methods. Here are the usual steps necessary:
- Upload sample data. Duco will automatically guess the format
- Check and change the field definitions, if necessary.
You can also add, remove, and reorder fields. This is usually needed when the input format for an existing process has changed and you need to update the format definition in Duco to reflect this change.
Creating a data input definition from sample data
When you first create a process the Data inputs screen looks as follows:
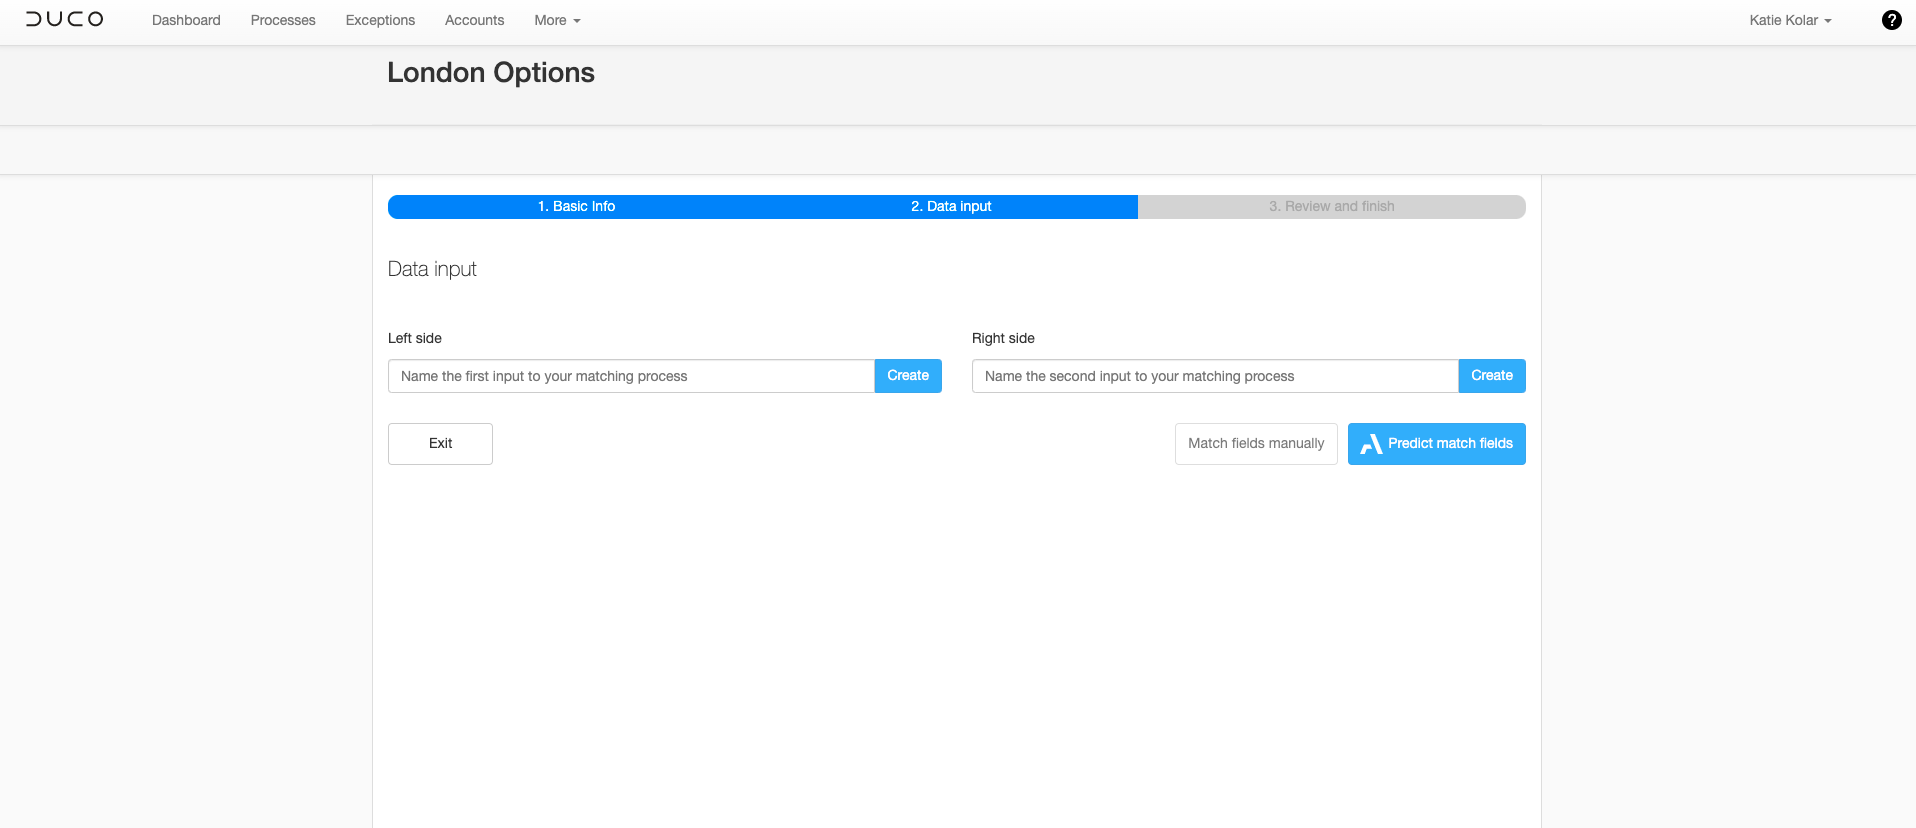
- Enter a name for the first data input and click on Create.
- Choose a sample input file and click on Upload
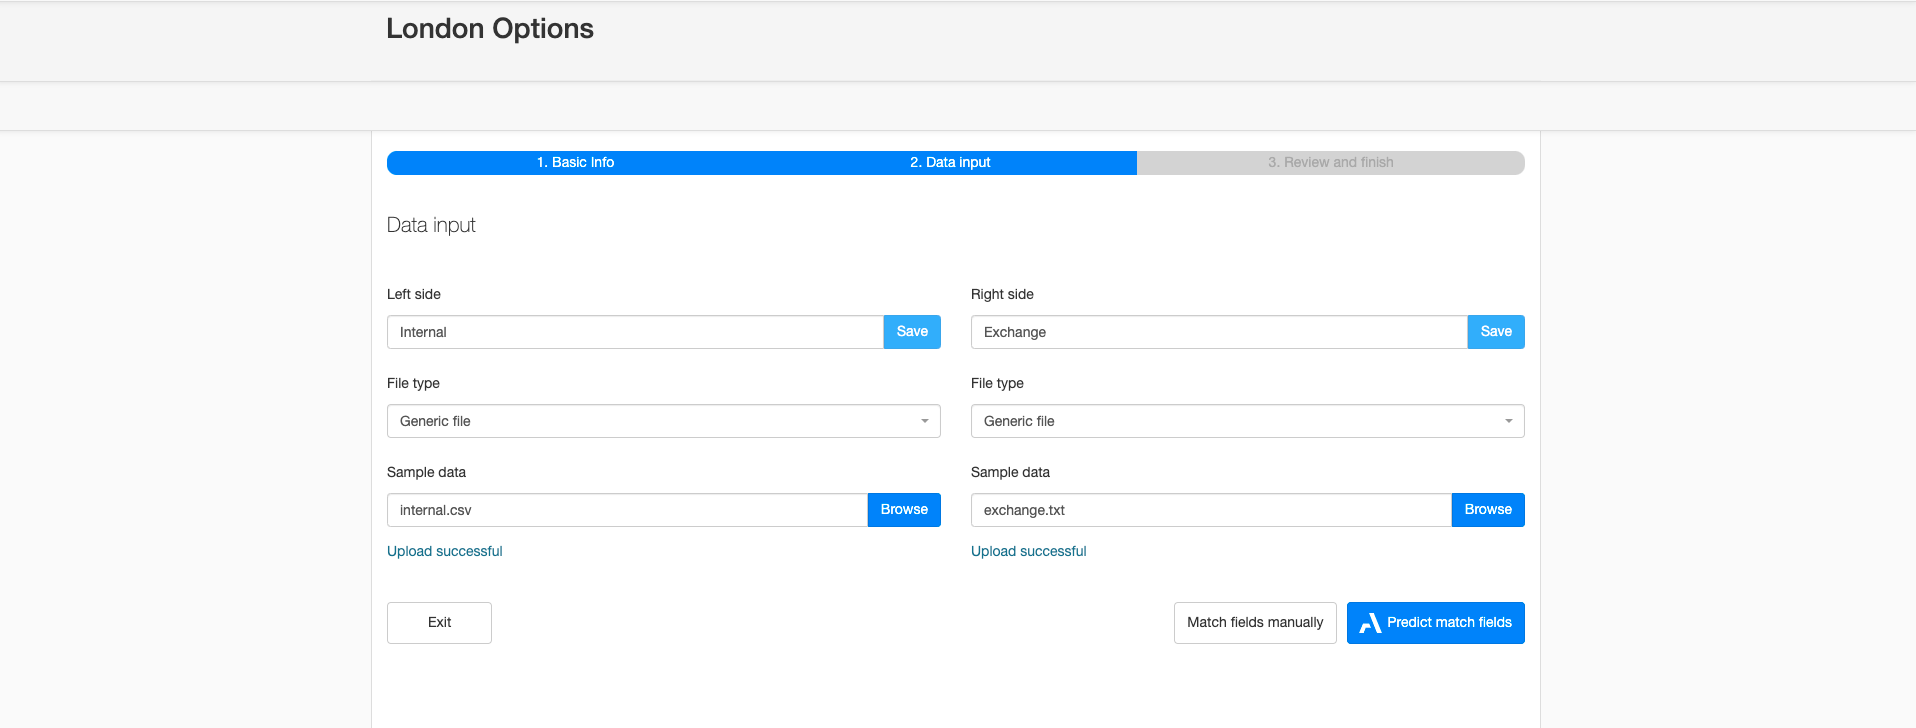
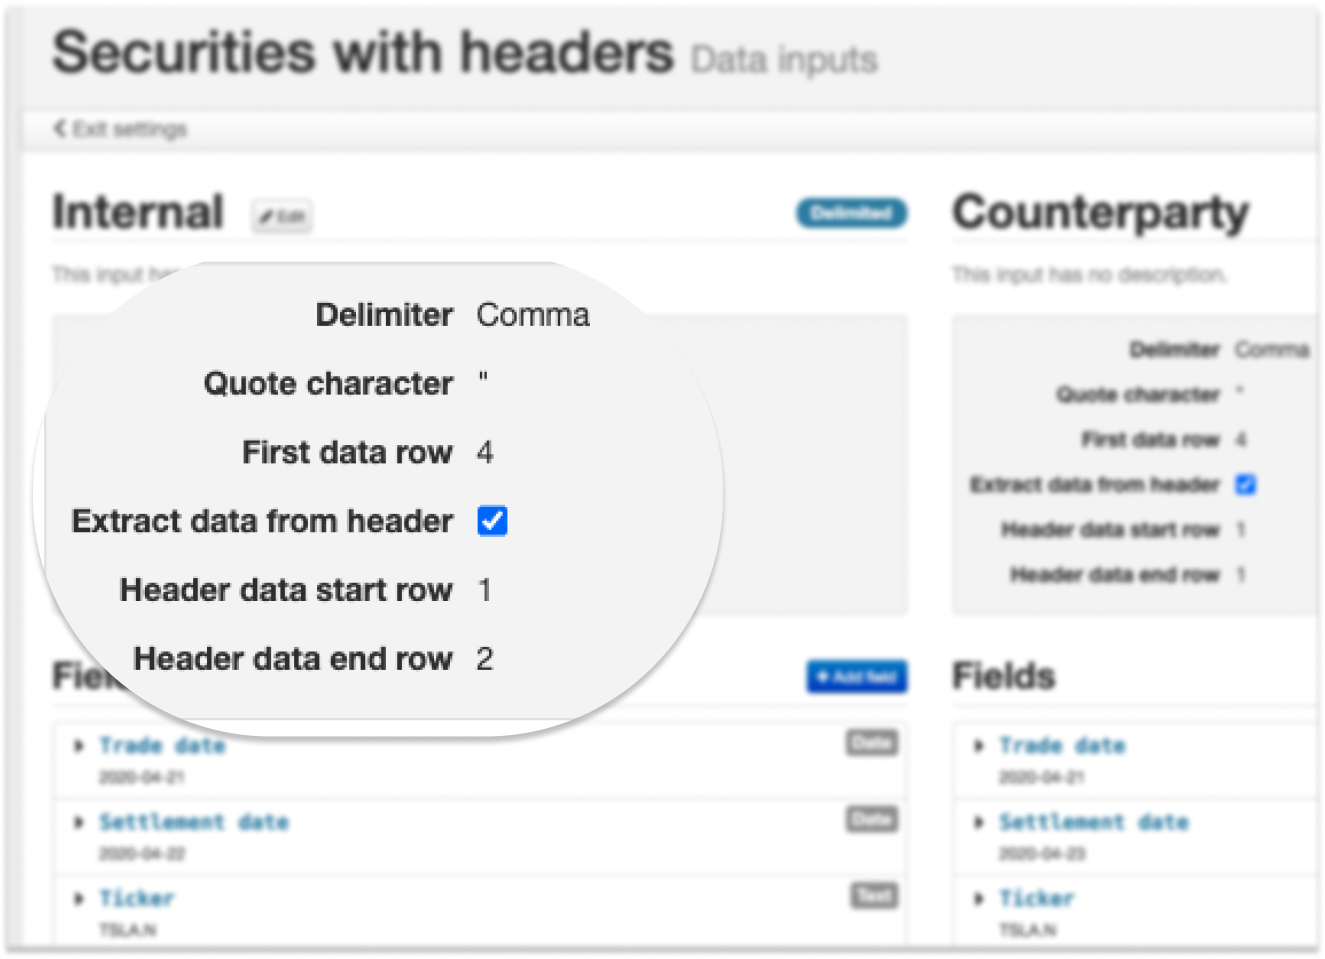
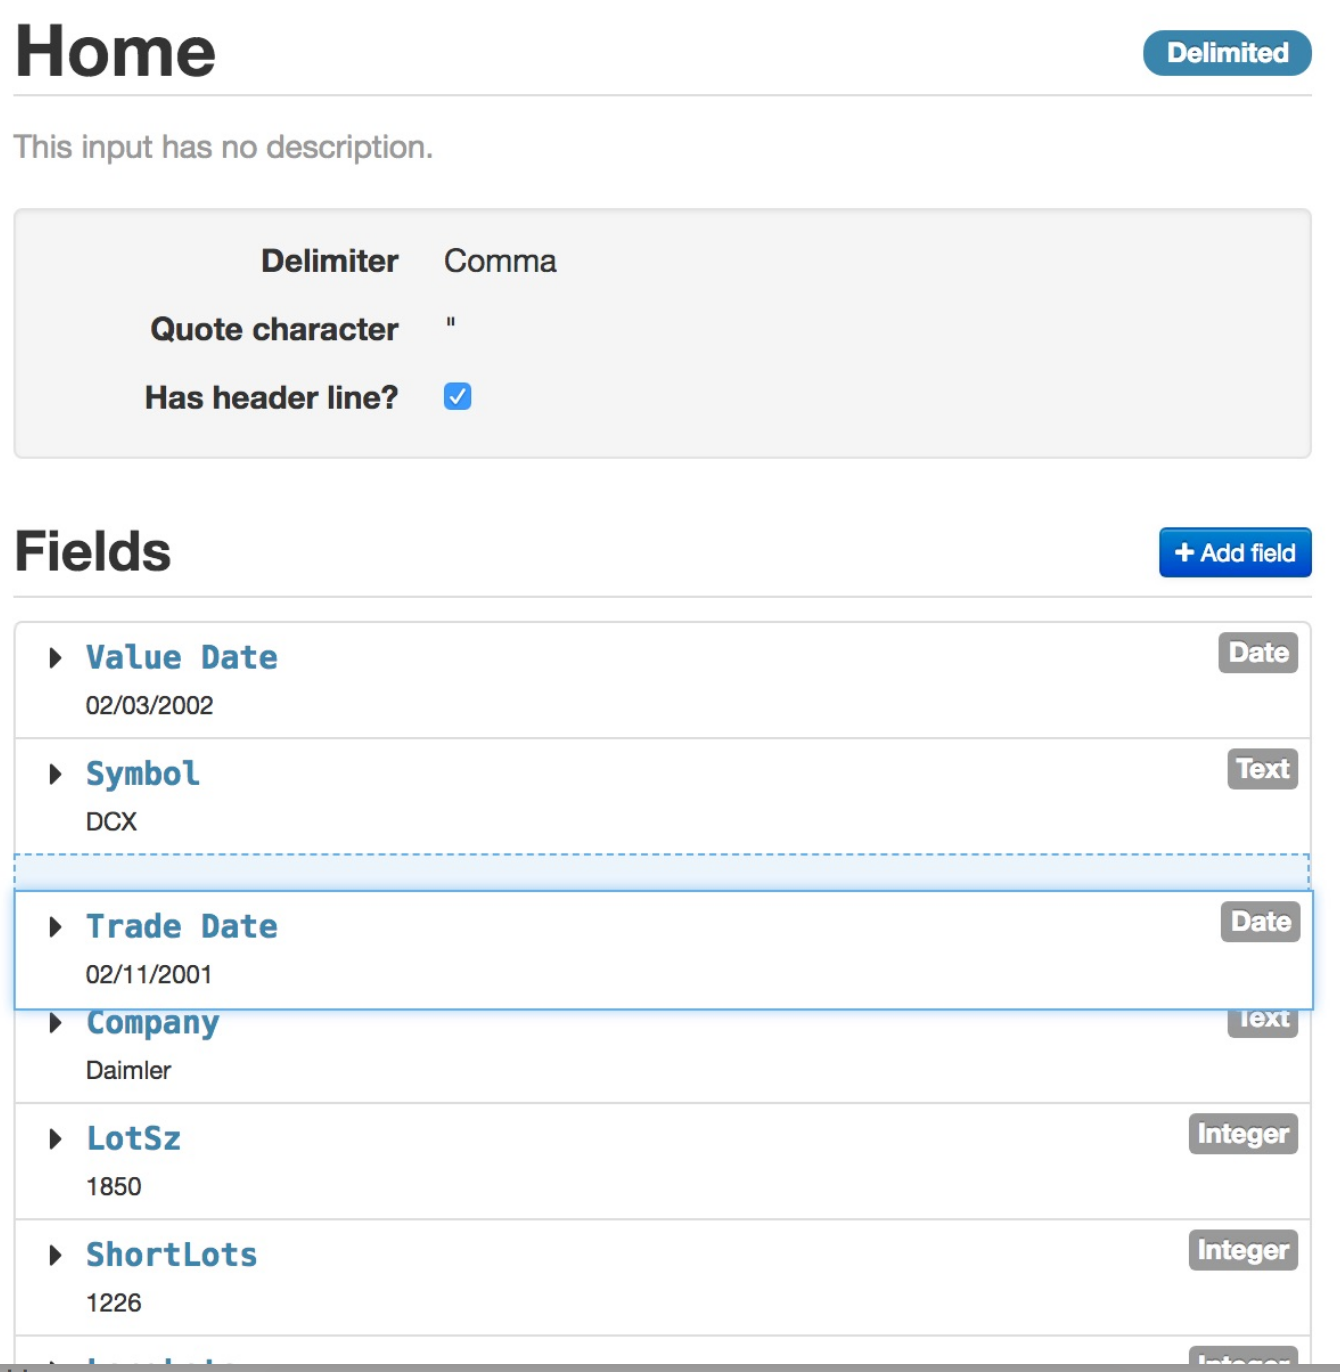
The following picture shows the result.

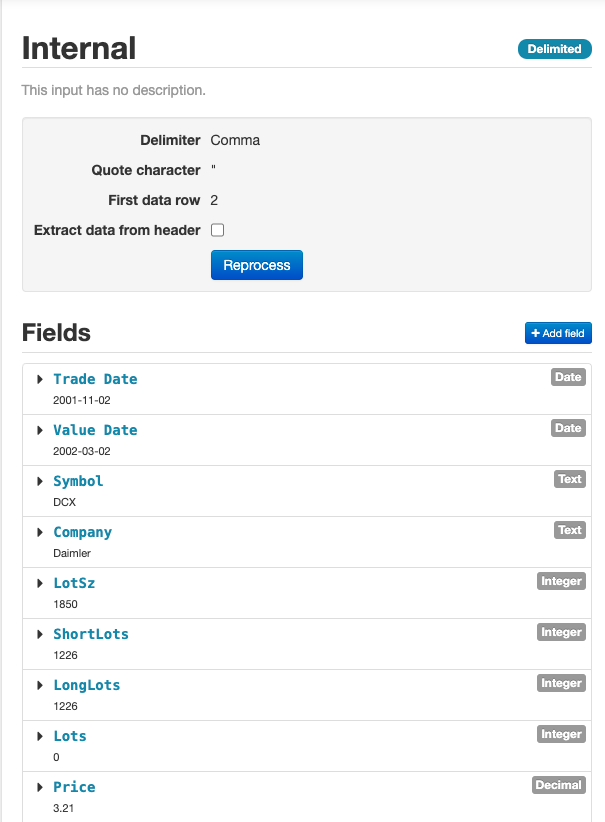
Duco is able to detect automatically many data format variations.
In this case, for example, it has detected that:
- The sample data uses a comma (,) as a field separator
- The first line of the file is a header line
- The first field is "Trade Date" and is of type "Date"
- The second field is "Value Date" and is also of type "Date"
- The third field is "Symbol" and is of type "Text"
You can also see, under a field name, that Duco shows an example value taken from the sample data provided.
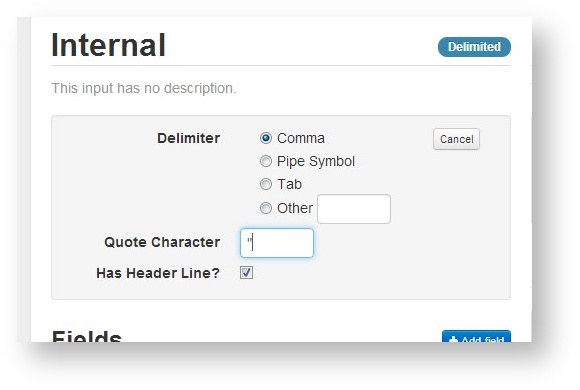
Changing the input data format definition
If Duco has detected any fields incorrectly, or the input data format has changed, you can update the format definition. You can change the delimiter, the quote character, and enable/disable the header line, if needed. To do this:
- Click on the Edit button that appears when you place your mouse pointer near this area.
Extract file header information from delimited files
Some delimited files may have additional data stored at the beginning of the file i.e. the file header. You can choose to extract data within the header portion as part of processing. Here, you can specify where your actual data starts in the file, and which preceding lines are header data that you want to use for match field transformation rules.
Uploading a file with multiple tabs or sheets
When setting up a new process, upload the file with multiple sheets that you would like to use as the sample data file. Duco will read the file and notice that there are multiple sheets. You can then select the name of the worksheet, or the number index by which it appears in the sheet.
Once you select which sheet to use, Duco will process it like a standard data input.
If you need to change which sheet Duco is using after the process has been set up, you can do so in the Data Inputs screen. Here, you can reconfigure the input:
Changing the input on any process to a data prep process
In the March 2023 release, we have enabled the ability to change any existing reconciliation input to a Data Prep process. This will work on all cash, one-sided, and two-sided reconciliations. This will help reduce manual work, react quickly to the market changes, and unblock some key pain points below:
- React quickly to market or counterparty format changes
- Freedom to change upstream sources without losing previous run results
- Change existing inputs without creating a brand new process
- Reduce the number of reconciliations and consolidate into single process fed from data prep
- Support the upcoming SWIFT ISO20022 Cash MT940/MT950 migration
Please note we are continuing to make this complex user journey easier, and appreciate any feedback on how we can make these transitions of inputs easier for our users. Please feel free to contact your Account Director or Success Manager with any inputs.
For more information on how to change a data input to a data prep process, read the instructions here. Please note to follow these directions explicitly, as mistakes made here could lead to data loss.
Data Input Templates
Duco provides standard input templates for some of the commonly used message types. See here for more details.
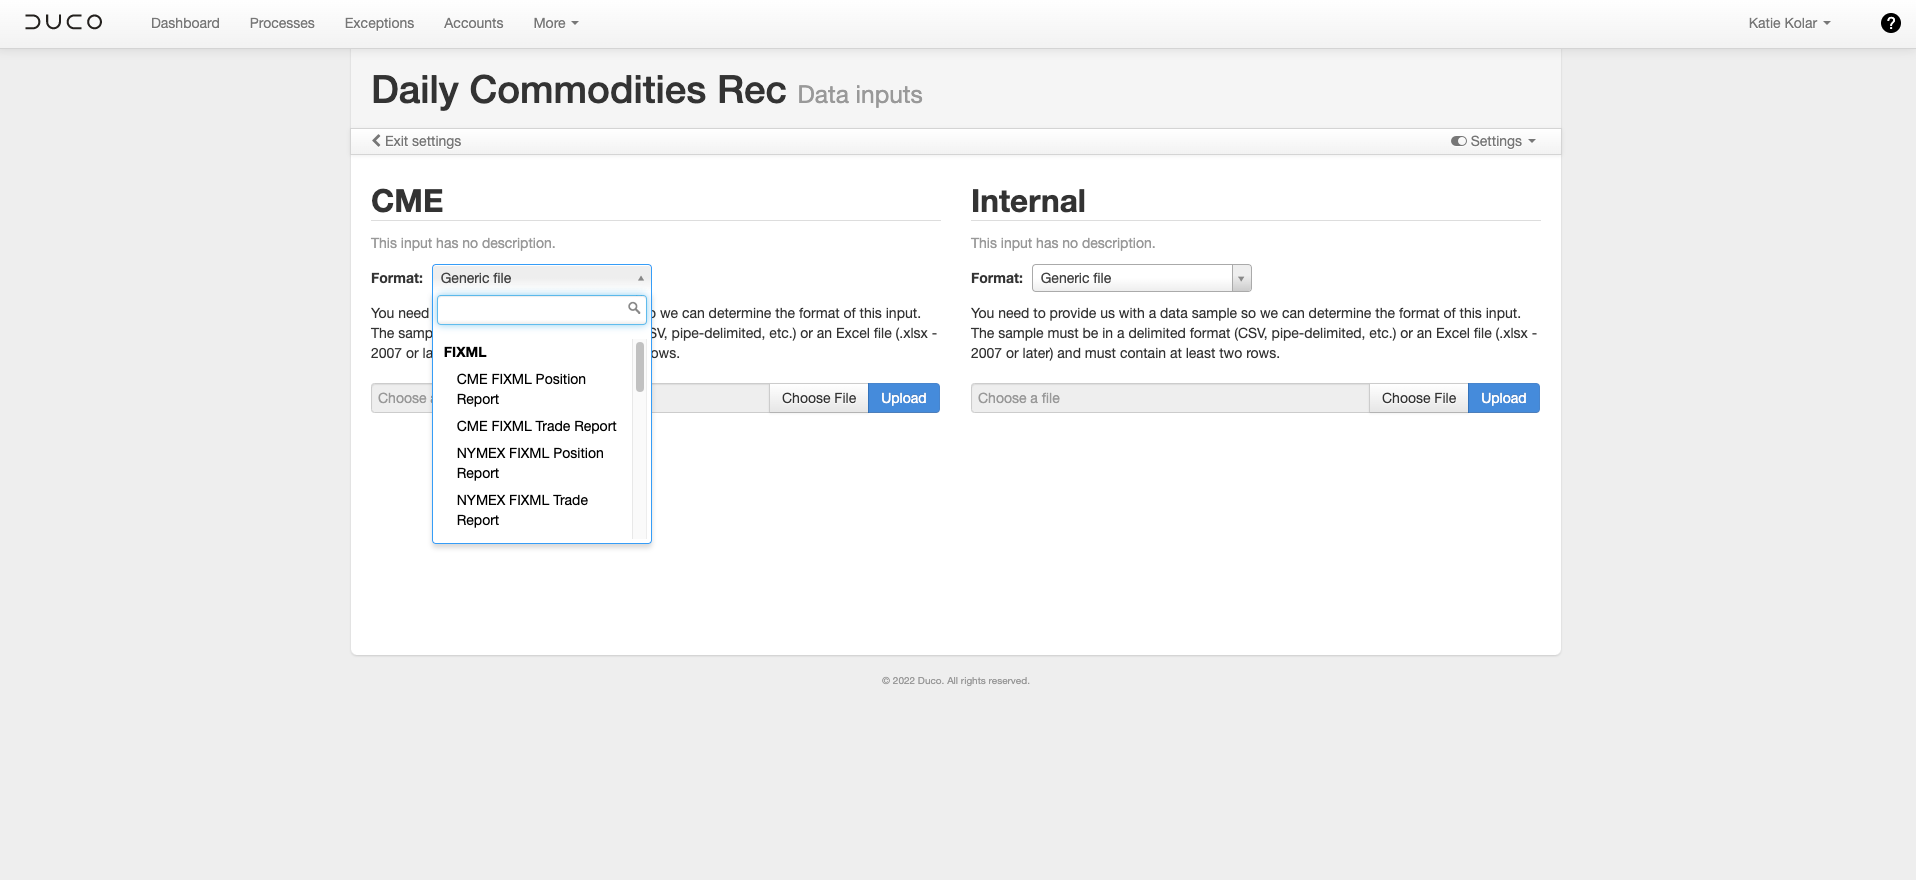
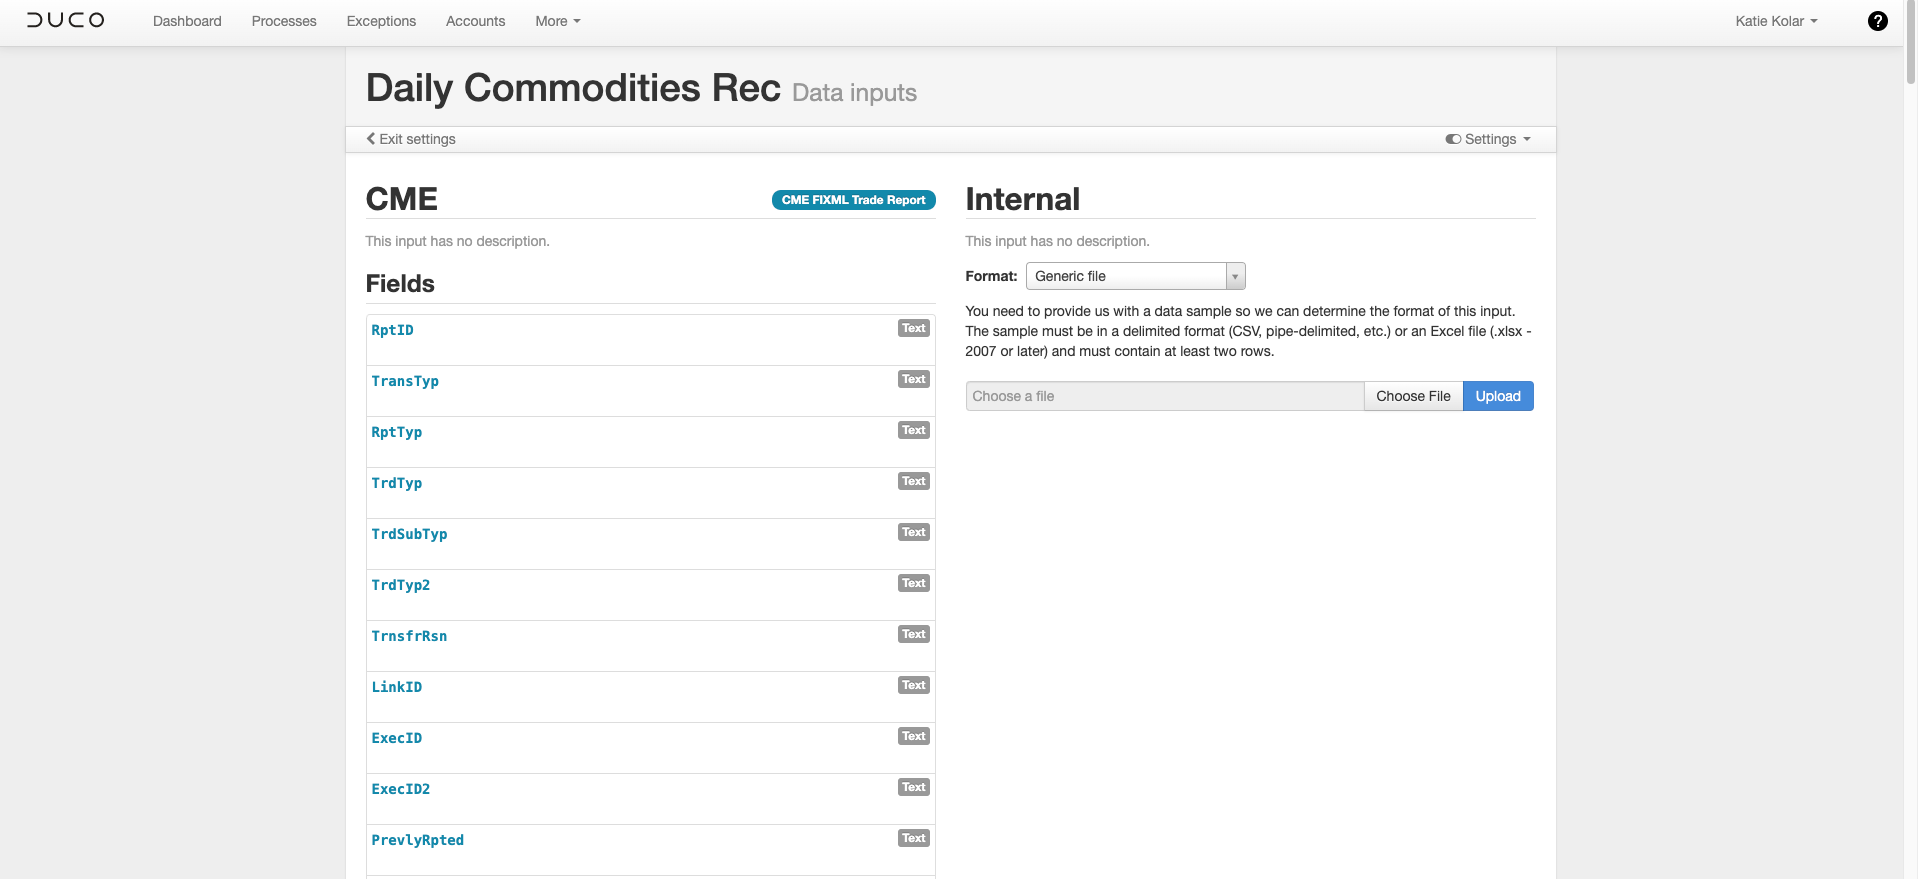
FIXML Position and Trade Reports
You are also able to load FIXML trade and position reports from CME, NYMEX, OCC and ICE directly into Duco. Simply select the relevant format, when first setting up a process.
SWIFT Statements
A process can be configured to use SWIFT templates for trades (MT536), positions (MT535) or Statement Messages (MT940 & MT950). Simply select the relevant format, when first setting up a process.
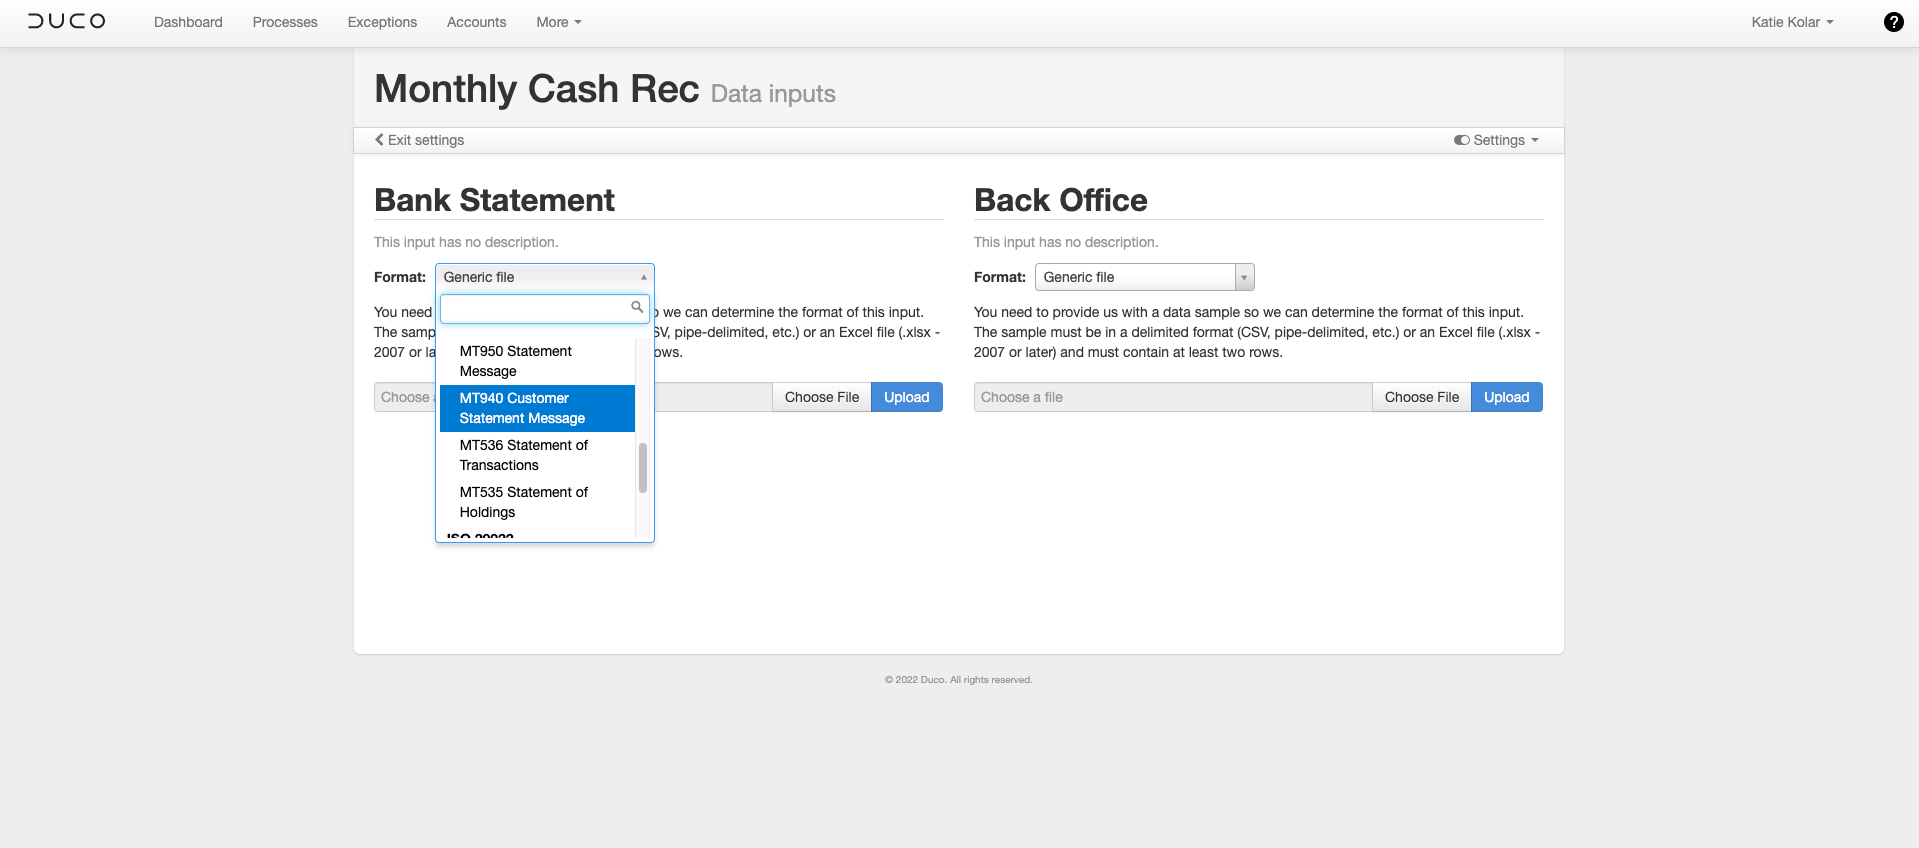
Duco will then automatically create the relevant fields for you:
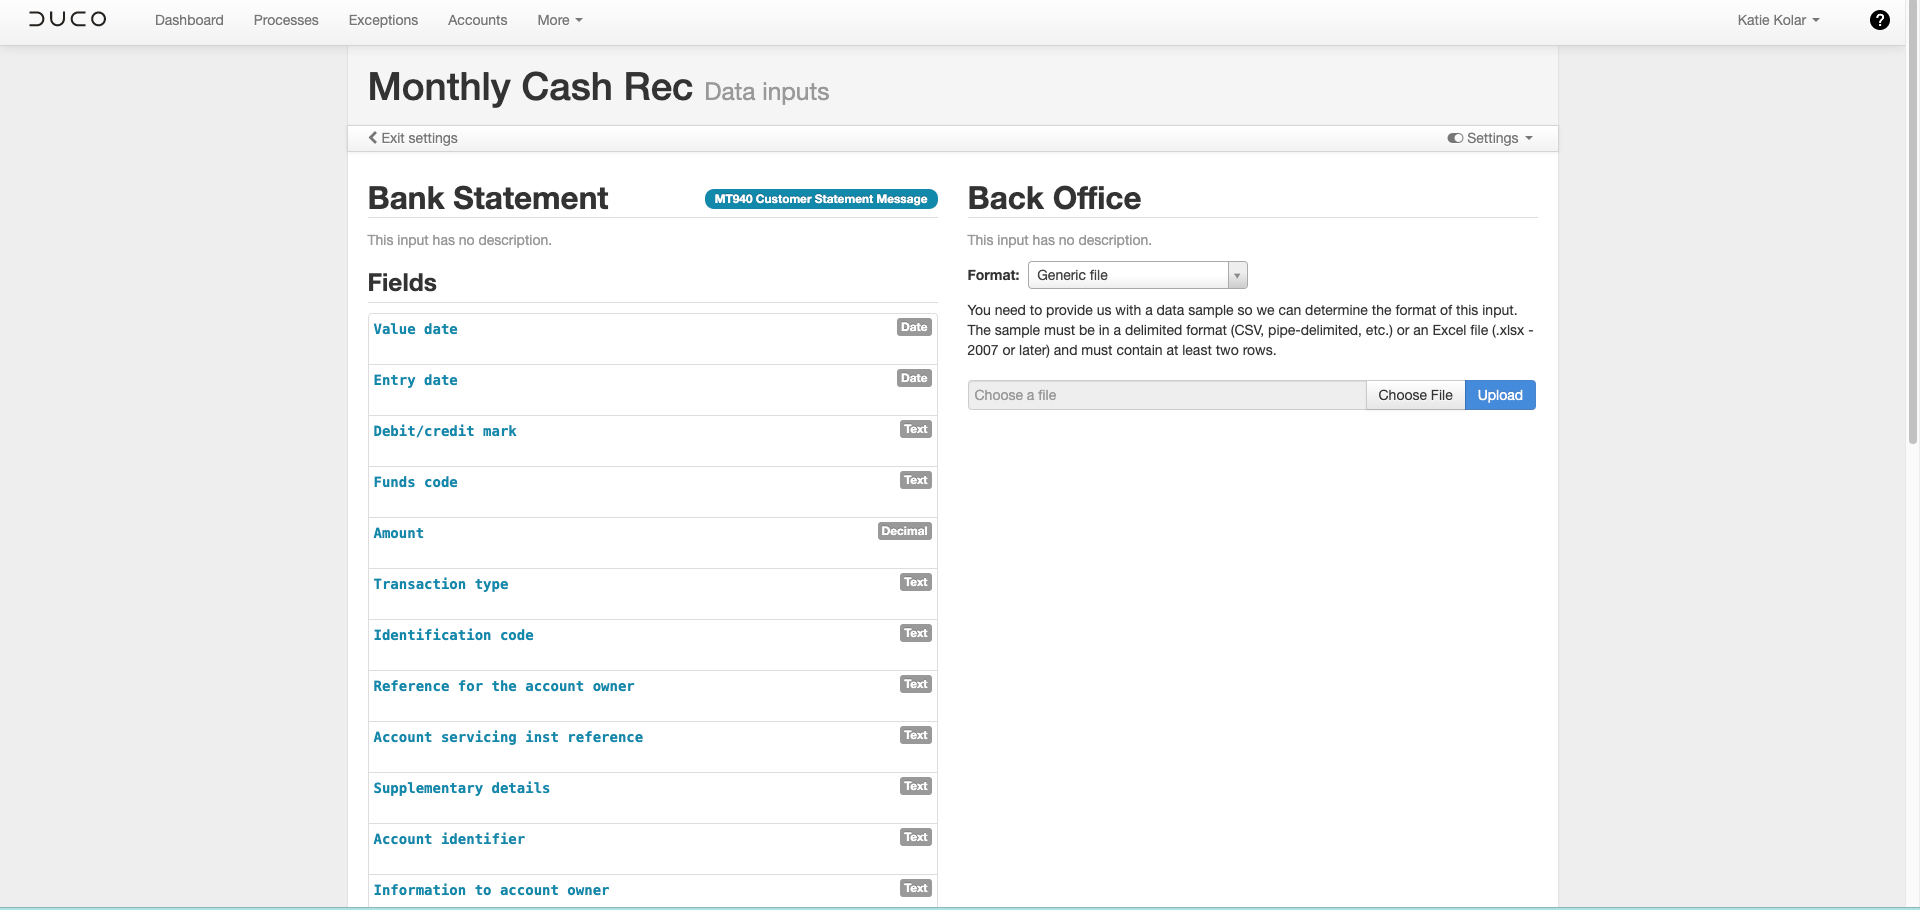
MT940 Statement
MT536 Statement

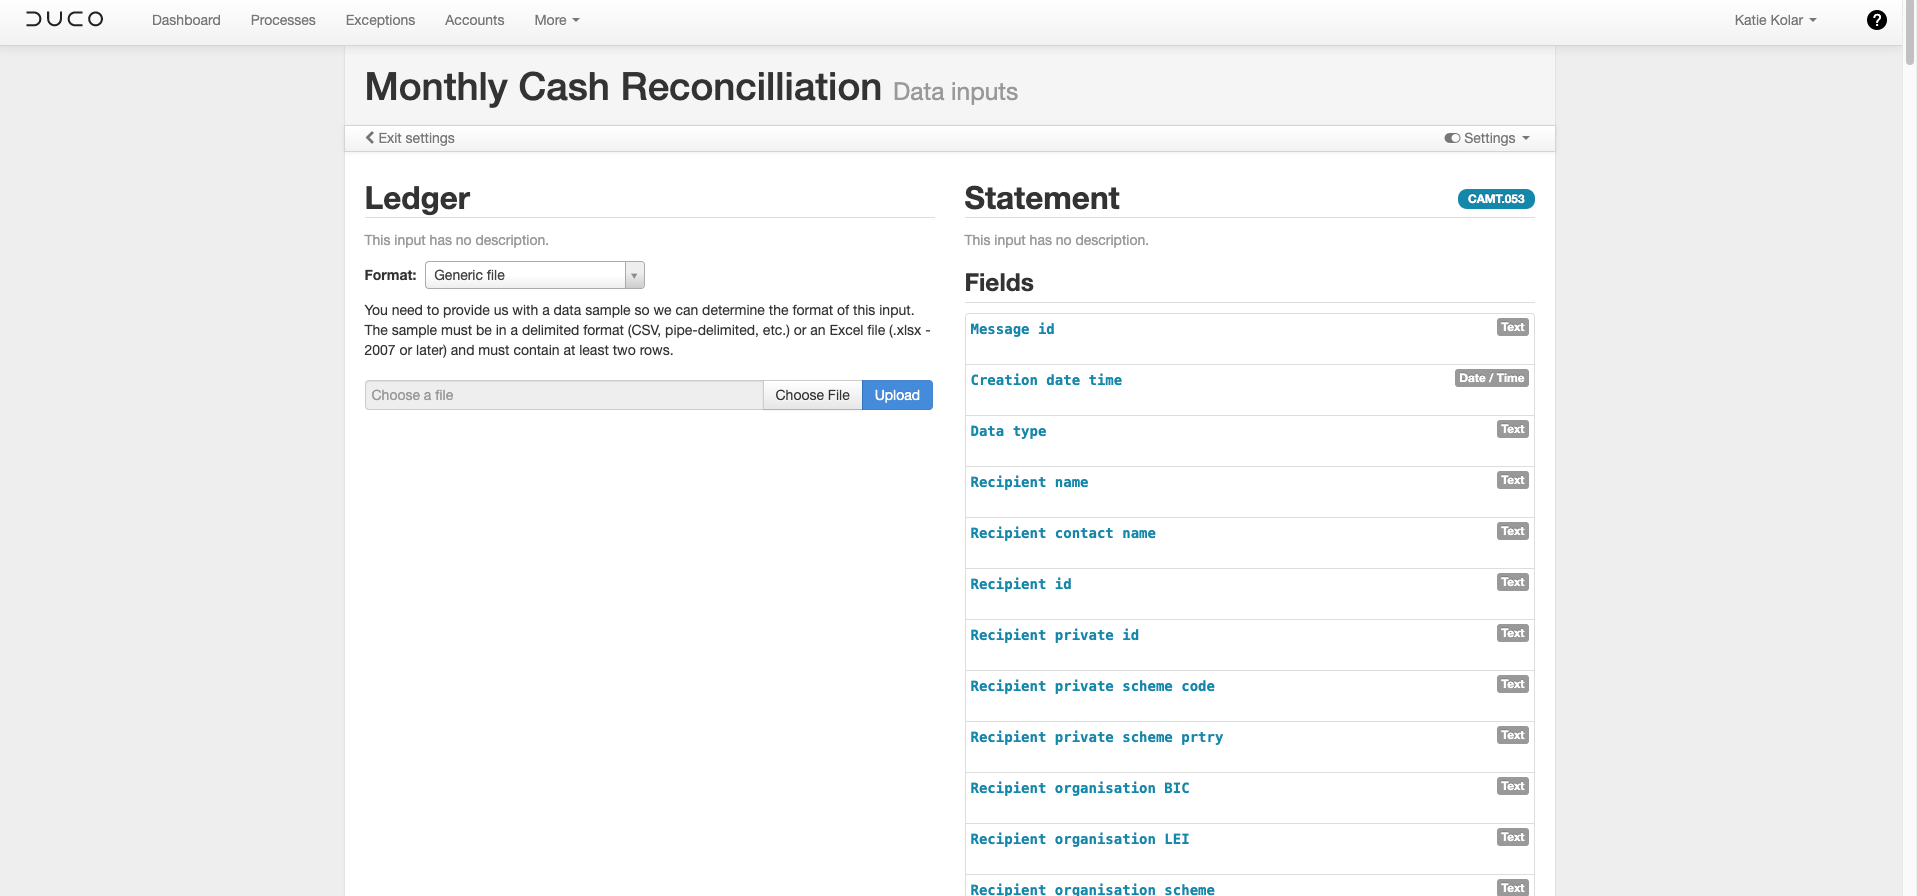
CAMT.053 Statement
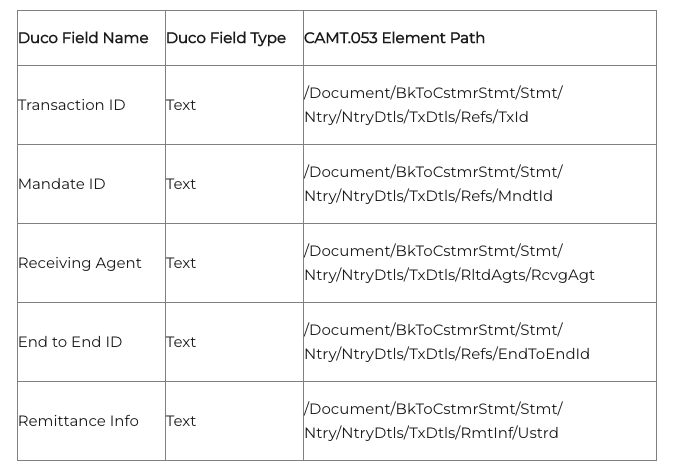
When ingesting camt.053 messages into your Duco processes, we are now extracting 5 additional fields to the existing 200+ field set, allowing you to use them to increase matching accuracies and help in exception investigations. See below:
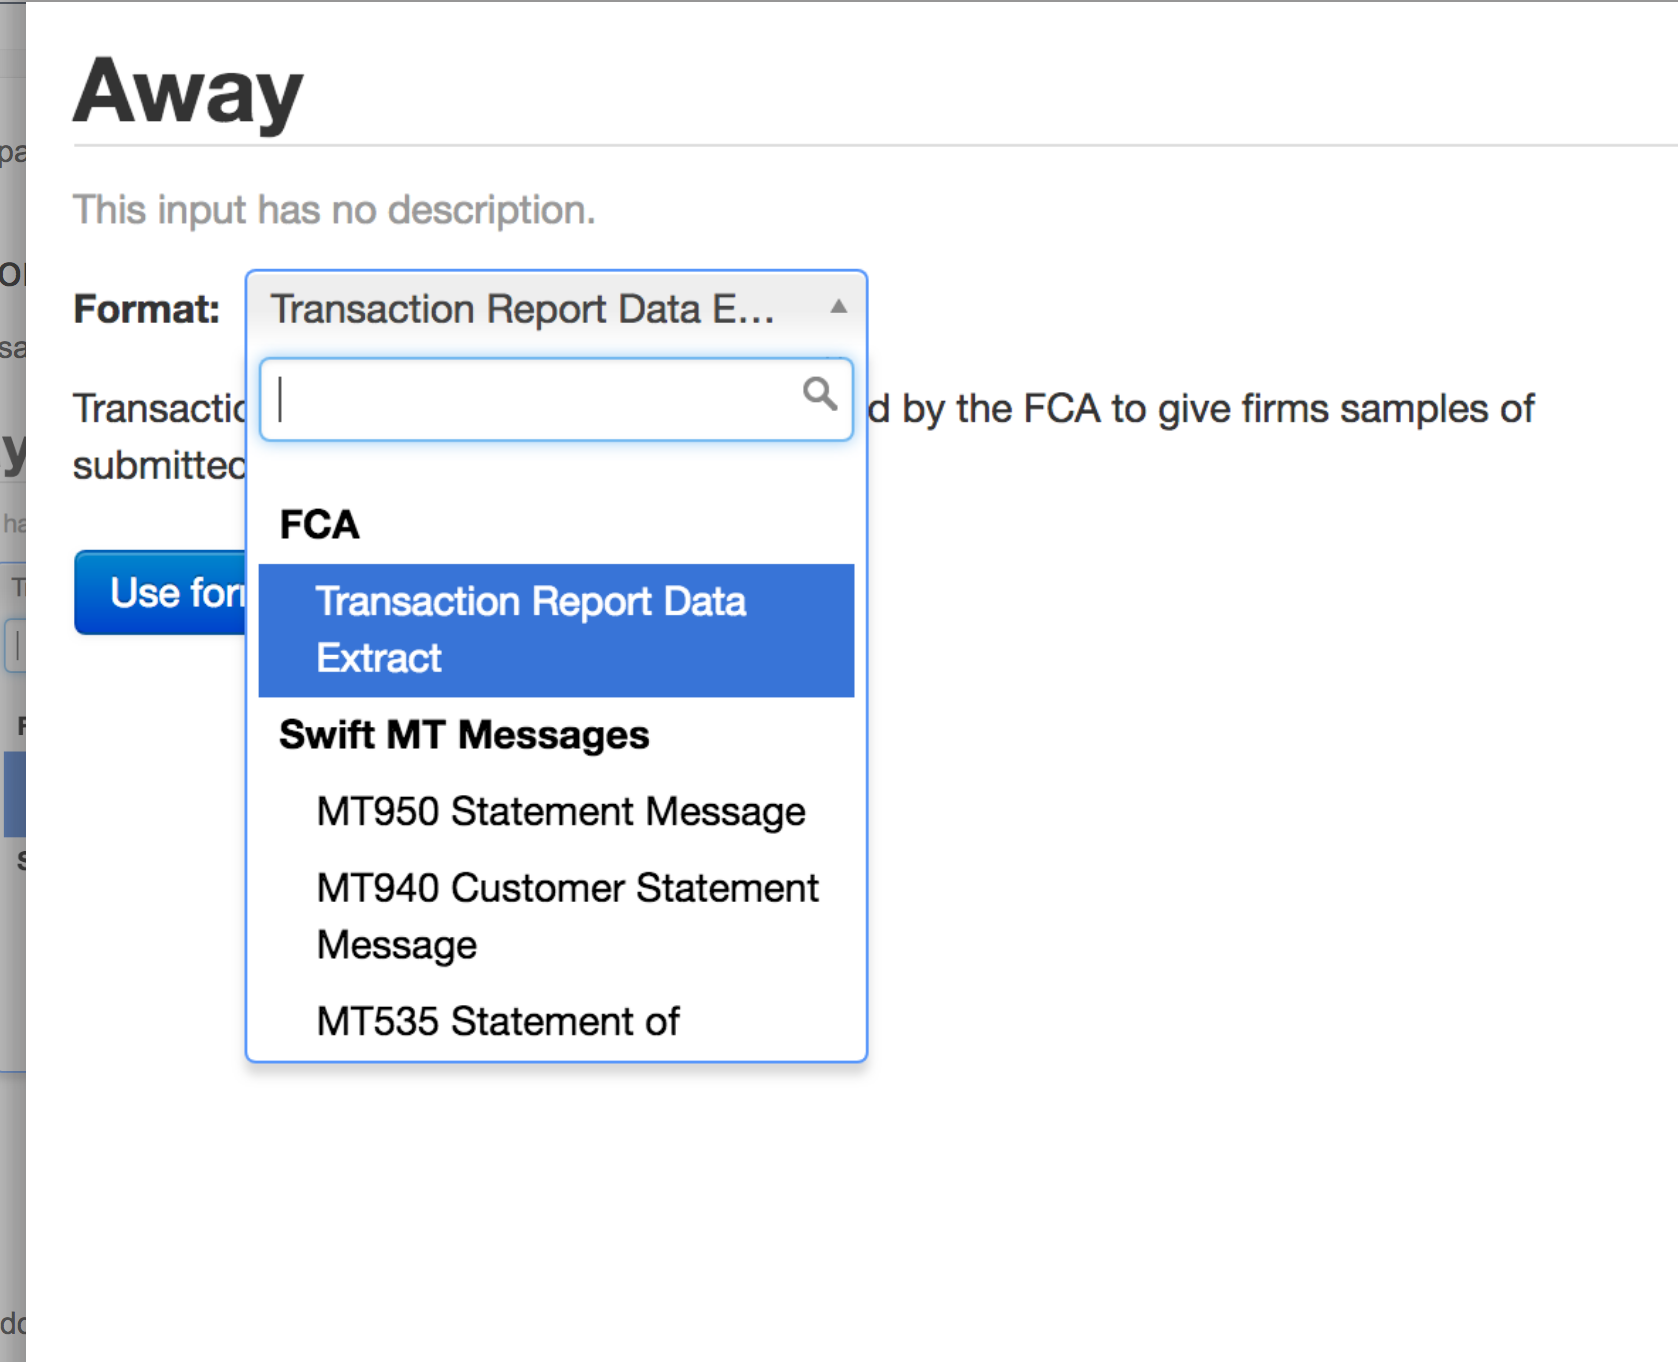
FCA's transaction report data extract
FCA's transaction report data extract (which is used for sample transaction data requests under MiFIR/MiFID II) (can also be configured)). Simply select the relevant format.
Reordering fields
Duco expects submissions for each side of a given process to reflect the field order defined in Data inputs. When the format of the input file changes, you may wish to re-order fields in order to realign them to the new input.There are two ways to change the order of the fields.
The first is simple drag and drop. Clicking on the target field will allow you to toggle its sequence.
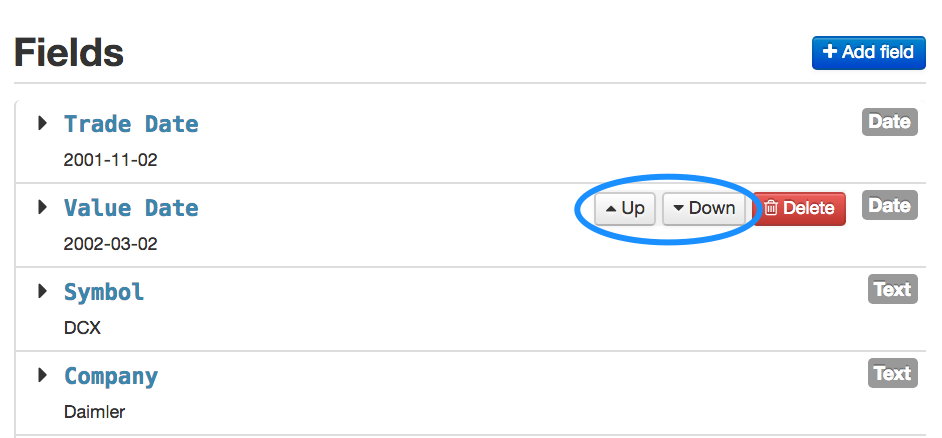
The second method is to use the Up and Down buttons on the right of the field name.
Deleting a field
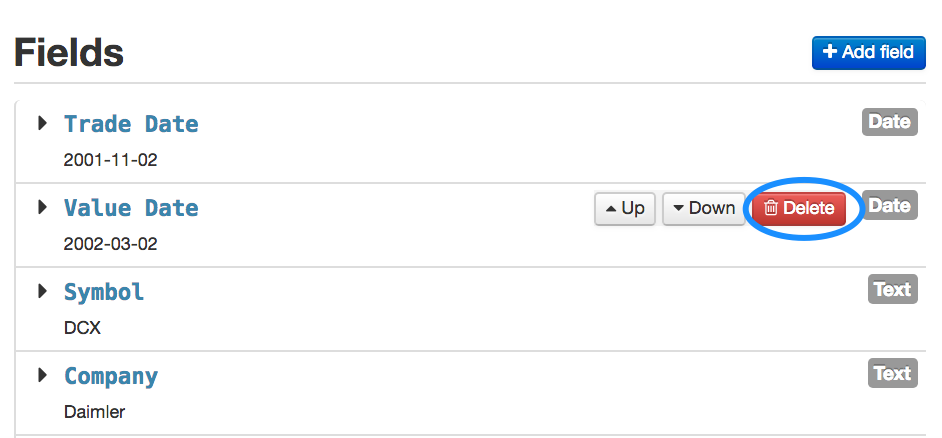
To delete a field
- Click on Delete on the right of the field name.
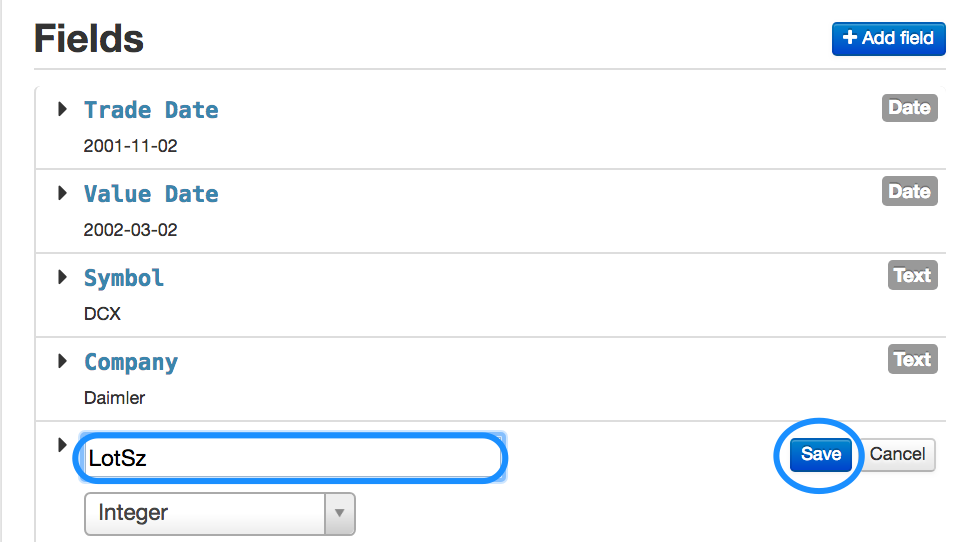
Renaming a field
To rename a field
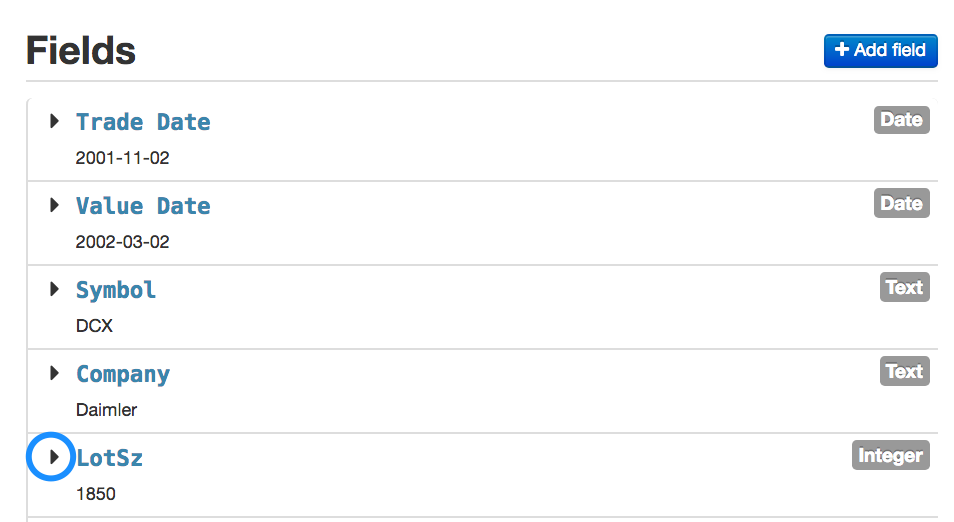
- Click on the black arrow on the left of the field name
- Enter a new name in the text box
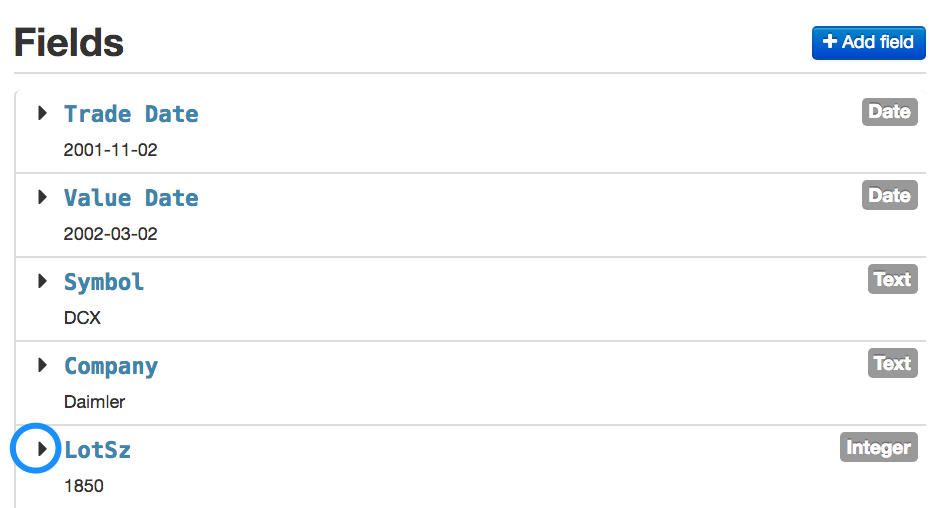
- Click on Save
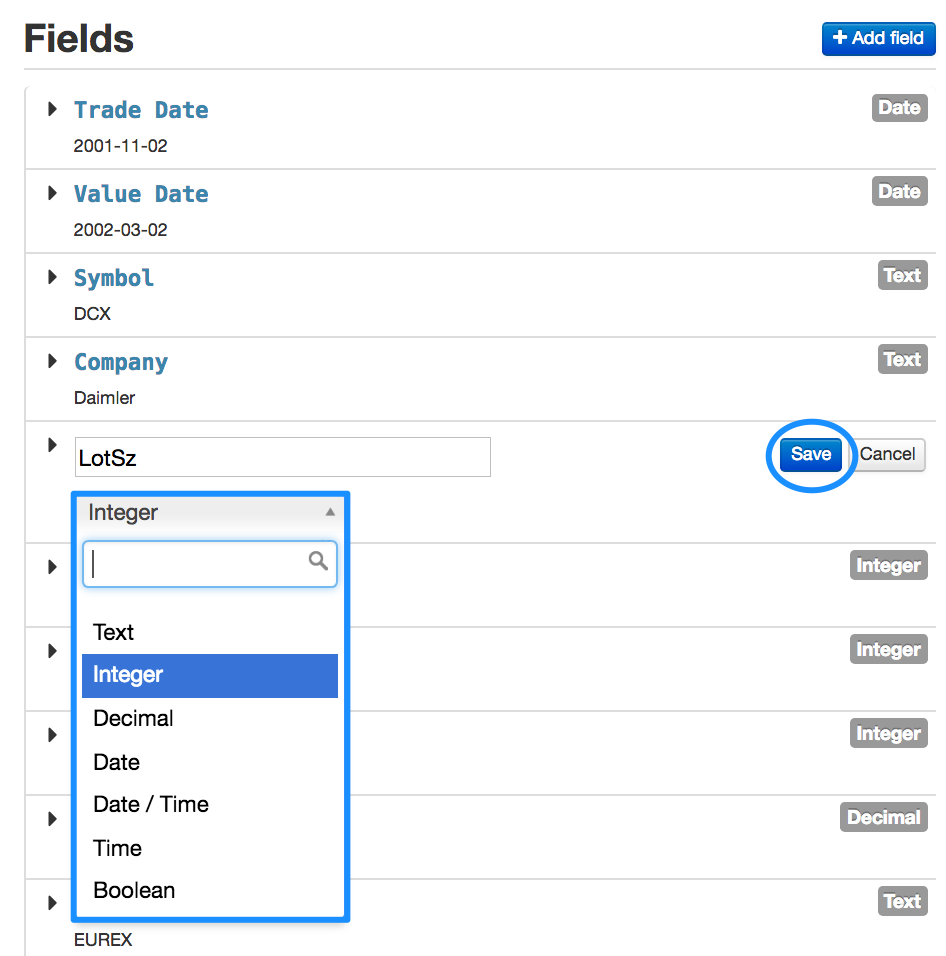
Changing a field's data type
You can also change the field's data type, if you think that the data type that Duco has detected automatically is not suitable.
- Click on the black arrow on the left of the field name
- Select a suitable data type from the drop-down menu
- Click on Save
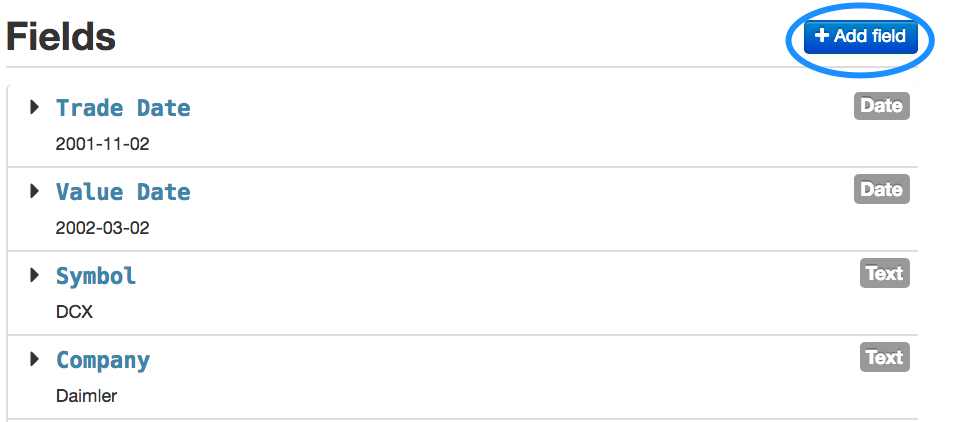
Adding a new field
To add a new field
- Click on Add field
- Enter the field name and click Add
- Edit the data type as explained previously in this page.
Date and time formats
In the vast majority of cases Duco automatically recognises the date and time format so you will rarely need to change the input format definition. This is extremely useful as date and time formats can be surprisingly complicated! There are many conventions for entering dates and times so it is not unusual for different companies to apply different conventions.
A date within a data set can therefore be represented in many ways. For example:
- 2013-01-16
- 16/01/2013
- 01/16/2013
- 16 Apr 2013
- 20130116
- etc.
Same thing for time:
- 14:30:00
- 143000
- etc.
The most frequently used formats are listed below:
|
Date and time value
|
Pattern
|
|---|---|
| 2013-01-16 | yyyy-MM-dd |
| 16/01/2013 | dd/MM/yyyy |
| 01/16/2013 | MM/dd/yyyy |
| 16 Apr 2013 | dd MMM yyyy |
| 20130116 | yyyyMMdd |
| 14:30:00 | HH:mm:ss |
| 143000 | HHmmss |
| 2013-01-16T14:30 | yyyy-MM-ddTHH:mm |
| 2013-01-16 14:30 | yyyy-MM-dd HH:mm |
With the exception of the formats highlighted in red (which are identified as integers), Duco will recognise all these formats automatically.
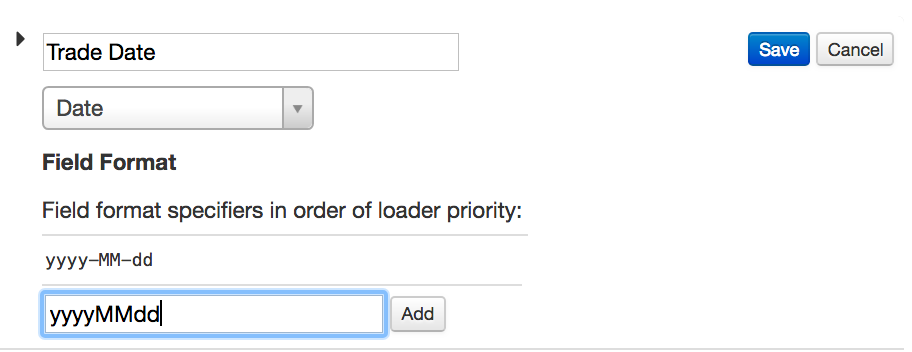
However, it is possible to set Duco to recognise e.g. 20130116 as a date rather than an integer in the following way:
- Click on the black arrow next to a field name
- Change the definition of the field from 'Integer' to 'Date/Time'
- The box will extend and prompt you to enter a value into the Field Format
- Enter yyyyMMdd and select the Add button
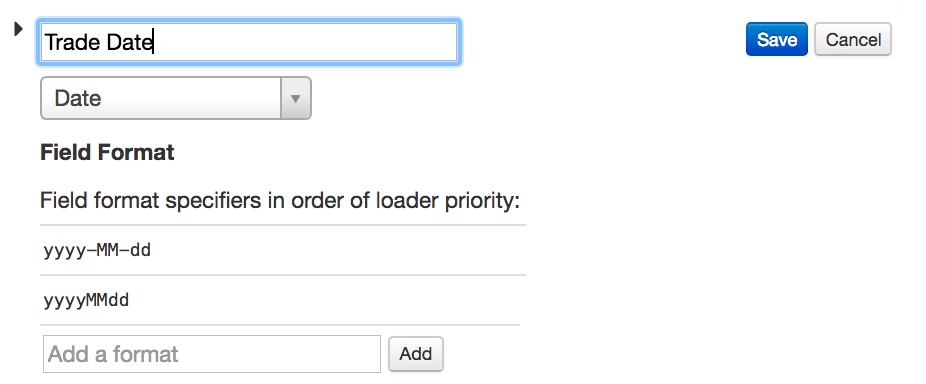
In a similar way it is possible to set Duco to recognise other date/time format conventions which aren't listed in the table, e.g. Duco will recognise 12:06:56.568+01:00 as a Date and Time format if you follow the same process as above but enter 'HH:mm:ss.SSSZZ' into the Field Format. In addition, if input data contains records with the date in multiple formats in the same field, Duco allows you to set several data formats to respond to this. For example:
The page Date and time format gives a detailed description of the formats available.